Best Foyer Floor Layout for Small Spaces (2026)
A small foyer can still feel open, organized, and welcoming — if the floor layout works with the space instead of fighting it. The wrong tile size or direction makes a compact entry feel cramped; the right choices make it feel deliberate and larger. Here is how to plan flooring for a small entry, from material to layout to budget.

Make a small entry feel bigger
- Use large-format tile. Big tiles mean fewer grout lines, which reads as more open and less busy than lots of small tiles.
- Run lines toward the room. Directing plank or tile lines away from the door draws the eye inward and visually lengthens the space.
- Carry one color through. Continuing the same floor color from the entry into the adjacent room removes visual breaks and makes both spaces feel larger.
- Consider a diagonal layout. Setting tile on a 45-degree diagonal can make a square mini-foyer feel wider, though it adds a little to labor and waste.
Durability still comes first
Small or not, the entry floor gets wet and gritty. Porcelain tile and luxury vinyl plank remain the best picks for the same reasons they win in large entries: water resistance, scratch resistance, and easy cleaning. In a tight space, add a slim, low-profile walk-off mat that fits without curling at the door swing.
Layout planning, step by step
- Measure the space and map the door swing so nothing blocks it.
- Dry-lay the tile and center the pattern on the doorway sightline.
- Avoid thin sliver cuts against the most visible wall — adjust the starting point instead.
- Decide on straight vs diagonal based on the effect you want and your budget.
- Plan transitions carefully where the entry meets the next floor type.
Common small-foyer flooring mistakes
- Using small, busy tiles that make the space feel cluttered.
- Breaking up the floor with a different color that shrinks the room visually.
- Oversized mats that curl or block the door.
- Ignoring the door swing during layout.
What it costs
Small areas often carry higher per-square-foot pricing because of minimum-charge fees, but total spend stays low. See the 2026 ranges below.
Frequently asked questions
What size tile is best for a small foyer?
Large-format tile. Fewer grout lines make the space feel more open than small mosaic-style tiles.
Which direction should flooring run in a small entry?
Run planks or tile lines toward the interior room to draw the eye inward and lengthen the space visually.
Does a diagonal tile layout help a small foyer?
It can make a square entry feel wider, but it adds labor and material waste, so weigh the effect against the cost.
Entryway Flooring Cost by Material (2026)
Below are typical installed price ranges (material + labor) for entryway and foyer flooring in the U.S. Entryways need durable, high-traffic-rated surfaces, so porcelain, stone, and hardwood are common choices. Figures are 2026 estimates and vary by region, subfloor condition, and layout complexity.
| Material | Installed Cost / sq ft | Best for entryways? |
|---|---|---|
| Luxury Vinyl Plank (LVP) | $4 – $9 | Good — waterproof, budget |
| Ceramic tile | $5 – $12 | Good — easy clean |
| Engineered hardwood | $6 – $14 | Fair — seal edges |
| Porcelain tile | $7 – $16 | Best — hardest wearing |
| Solid hardwood | $8 – $18 | Fair — refinishable |
| Natural stone (marble/slate/travertine) | $12 – $25 | Premium — seal for moisture |
Estimated installed ranges, 2026. A typical entryway/mudroom tile job runs about $500–$2,000. Sources: This Old House — Tile Flooring Cost, industry installer averages.
The tile crew glues down a woven fiber uncoupling mat before setting the heavy slate tiles with a highly flexible latex mortar. This multi-layered approach stops structural floor bounce, preventing cracked slate tile corners and holding up through seasonal weather changes.
Historic Vestibule Moisture Remediation
A historic brownstone home features a tiny entry vestibule with a damaged, hollow-sounding mosaic tile floor from the early twentieth century. Continuous rain water leaks beneath the front door have rotted the underlying wood framing, causing the old floor to sink.
The preservation group executes a meticulous structural repair plan to save the historic entrance. Work crews carefully remove the broken mosaic tiles and cut out the rotted wood joist sections down to clean timber. They sister new pressure-treated joists alongside the original beams, securing the wood with heavy-duty galvanized structural bolts.
Installers lay a thick sheet of marine-grade plywood over the new framing and apply a continuous coat of waterproofing membrane. They lay new hand-cut marble mosaic tiles using waterproof epoxy grout to prevent future water leaks from reaching the wood. This solid repair restores the entrance’s historic look while creating an airtight barrier against future water damage.
Coastal Entry Sand Abrasion Barrier
A beachside cottage features a tight entry space that handles massive amounts of sharp sand, salt water, and bare feet every day. The existing wood floors have suffered from deep scratches, water stains, and wood rot around the front door threshold.
The remediation plan implements a highly durable, recessed walk-off mat layout to catch sand and water instantly. Carpenters cut out a shallow section of the wood subfloor framing directly behind the front door to create a recessed box. They line this pocket with a thick sheet of waterproof stainless steel to catch any water leaks.
Inside this metal pan, they install an extra-thick, commercial-grade nylon scrape mat that sits perfectly flush with the living room floor. The heavy mat traps abrasive sand and salt water inside the recessed box, keeping grit from scratching the interior wood floors. The entire mat can be lifted out easily for quick vacuuming, keeping the beach cottage entry clean and organized.
Capital Planning, Lifecycle Budgets, and Procurement Resource Allocation
Building a high-performance entry floor requires a detailed understanding of material budgets, specialist trade labor, and long-term maintenance costs. Projects fall into three distinct pricing categories based on structural subfloor preparation, material quality, and necessary leveling work.
A Tier 1 layout focuses on installing standard composite tiles over an existing flat subfloor without changing the underlying framing. This entry setup uses basic tile dimensions, standard polymer mortars, and simple metal transition strips without installing heating mats or pouring self-leveling underlayments. A Tier 2 project introduces advanced custom assemblies, such as pouring thick self-leveling cement beds, rolling out uncoupling mats, and installing custom stone borders. A Tier 3 project involves full structural subfloor reconstruction. This top-tier work requires sistering damaged floor joists, pouring commercial epoxy terrazzo, laying large-format porcelain slabs, and wiring automated floor-melt systems. This complex work demands close coordination between structural engineers, master masons, and certified electricians.
Comprehensive Foyer Floor Budget Allocation Structure
This matrix outlines projected cost ranges across key construction phases based on the selected structural tier and material requirements.
| Project Cost Element | Tier 1 (Direct Overlay) | Tier 2 (Reinforced Bed) | Tier 3 (Engineered Slab) |
| Subfloor Prep & Structural Framing | $200 – $500 | $1,200 – $2,800 | $4,000 – $7,500+ |
| Waterproofing & Thermal Insulation | $150 – $350 | $800 – $1,800 | $2,500 – $5,000+ |
| Material Finish Procurement | $400 – $1,000 | $2,500 – $5,500 | $6,000 – $14,000+ |
| Transition Strips & Expansion Joints | $50 – $150 | $300 – $700 | $1,200 – $3,000+ |
| Specialist Masonry & Finishing Labor | $400 – $900 | $1,800 – $4,000 | $5,500 – $12,000+ |
| Total Structural Budget Estimates | $1,200 – $2,900 | $6,600 – $14,800 | $19,200 – $41,500+ |
Structural Tooling Profiles, Calibration Gauges, and Substrate Assembly
Electronic Moisture Pin Meters
Detecting hidden moisture levels inside wood subfloors requires specialized electrical testing tools. Carpenters push sharp metal meter pins deep into the plywood subfloor to read structural moisture percentages before laying tiles. A moisture reading above twelve percent indicates dangerous dampness that must be dried out completely to prevent wood rot and mold. This testing process ensures the subfloor is dry, preventing adhesive failure and keeping the tile installation stable.
Precision Mechanical Dial Indicator Gauges
Measuring subfloor bounce under heavy walking forces requires sensitive mechanical measurement tools. Engineers mount dial indicators beneath floor joists to track structural movement down to a thousandth of an inch. They have a person jump on the floor above to verify the framing meets strict non-deflection building rules. This testing process locates weak framing areas that need extra wood blocking before premium tile finishes can be installed.
Heavy Notch Premium Trowels
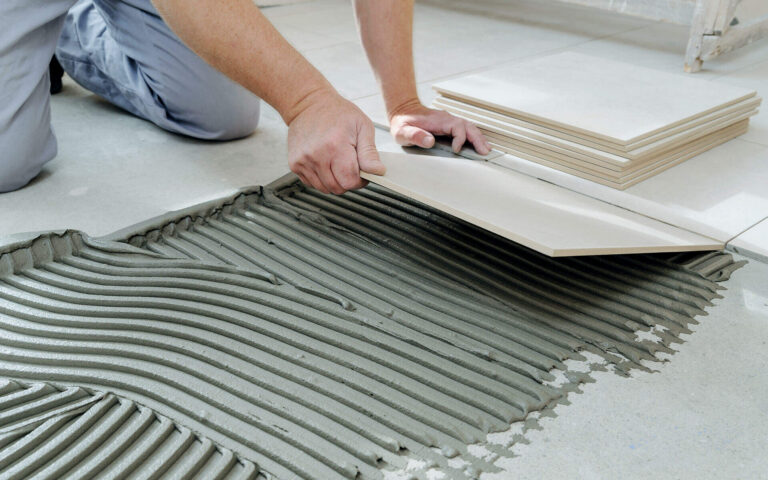
Spreading tile mortar evenly requires specialized notched steel trowels that create clean, uniform ridges. Tile setters use half-inch loop notches to achieve total mortar coverage beneath large porcelain slabs, eliminating weak hollow air pockets. Pressing the large tiles down flat breaks the mortar ridges together, forming a solid bond that prevents tile cracking from heavy shoes.
Floor Surface Laser Scanners
Checking floor flatness across small entry spaces requires precision self-leveling laser scanners. Installers bounce laser lines across the floor to locate tiny bumps or dips that could cause tile corners to stick up unevenly. They fill in any low spots with high-strength self-leveling cement before laying down tiles. This careful scanning process creates a flat floor surface that eliminates physical tripping hazards.
Architectural Failure Modes, Structural Deflection, and Compounding Risks
Subfloor Moisture Expansion and Tile Popping
Entryway floors face intense physical stress because they handle concentrated walking traffic and regular puddles of dirty water. A severe failure mode is tile popping caused by water soaking through grout lines into standard plywood subfloors. If water reaches untreated wood, the plywood swells up rapidly, destroying the adhesive bond and cracking the tiles above. Homeowners can prevent this by requiring a continuous waterproof membrane layer directly beneath the tile thin-set mortar.
Missing Expansion Joints and Wall Buckling
Another common risk involves wood floor buckling caused by missing expansion gaps along perimeter walls. When summer humidity levels climb, solid wood floors naturally swell outward as the wood grains absorb airborne moisture. If an installer fits wood boards tight against concrete walls without leaving an empty expansion gap, the wood will lift up and buckle. Leaving a clean half-inch expansion gap beneath baseboards allows the wood to move safely without warping.
Subfloor Flexing and Grout Line Fracturing
High-traffic entry areas can suffer from cracked grout lines if the underlying floor joists are too weak or spaced too far apart. When heavy occupants step on a flexible floor, the subfloor bends downward slightly, creating intense bending stress along rigid tile joints. This continuous movement breaks the brittle cement grout down into loose powder that sweeps out of the seams. Adding thick plywood sheets and solid cross-blocking stops the flexing, keeping grout lines clean and intact.
Preventative Asset Governance, Subfloor Monitoring, and Long-Term Adaptation
Preserving the structural strength, safety, and look of premium entryway flooring requires a structured, proactive maintenance schedule. Wood blocks and natural stone tiles need regular checkups to catch wear early. Homeowners should inspect grout lines and outer metal transition strips every twelve months to look for thin cracks or loose tiles. They should clean stone surfaces using neutral stone soaps and soft damp mops, avoiding harsh acidic cleaners that can eat away protective sealers.
Underfloor electric heating mats and automated temperature sensors require annual testing to ensure they run safely. Maintenance crews should measure electrical resistance levels inside heating loops every autumn before freezing winter weather arrives. They should adjust thermostat control settings to prevent rapid temperature spikes that could stress stone tiles, keeping the system operating efficiently.
The flexible silicone caulking joints running along baseboards and door thresholds need regular replacement to block incoming water. These rubbery seals dry out, shrink, and crack over time due to cold winter drafts and hot summer sun. Homeowners should inspect perimeter seals and replace peeling caulking every two to three years using premium waterproof silicones. This simple maintenance stops puddles from leaking into structural walls, preventing hidden wood rot and preserving the home’s value.
Quality Control Records Framework
To maintain a complete history of project tracking and maintenance, three documentation examples are outlined below for home management logs:
-
Subfloor Flatness Survey Map: Documents the exact laser leveling measurements and floor leveling sign-offs completed before laying uncoupling mats.
-
Mortia Bond Shear Test Certificate: A detailed record verifying adhesive bond strength and mortar coverage metrics across all entry tile zones.
-
Seasonal Maintenance History Sheet: A continuous diary tracking all stone sealer applications, grout repairs, and heating circuit checks completed over the floor’s lifetime.
Metrology, Performance Metrics, and Substrate Evaluation Signals
Homeowners should monitor the condition of their entry floor using clear, objective testing methods. Water barrier performance can be evaluated by checking how long water droplets bead up on stone surfaces. Tracking this water bead timeline helps locate worn sealer areas before dirty water can soak into porous stone pores. A high-performance floor sealer should hold water droplets on top for hours, preventing deep staining and making cleanups simple.
Acoustic performance is checked by measuring footsteps sound transmission through the floor into lower rooms. Homeowners can use a digital sound meter to verify that rubber underlayments are deadening heel clicks effectively. A proper floor assembly should mute sharp impact noises, keeping multi-family apartment buildings feeling quiet and private.
Structural stability is monitored by checking the alignment of tile grout lines and wood seams over changing seasons. Homeowners should check these lines every spring and autumn using a precision straightedge to see if tiles are shifting or sinking. Catching minor floor movement early allows for quick subfloor repairs, keeping the entry floor level, safe, and looking beautiful for decades.
Deconstructing Systemic Layout Misconceptions and Structural Floor Myths
The Myth That Large Format Tiles Make Small Foyers Feel Cramped
A common misconception assumes that laying large-format porcelain tiles inside a tight entryway makes the small space feel cramped and small. In reality, large tiles minimize the number of busy grout lines, creating a clean, open surface that makes tight halls look larger. Proper design uses large tiles to reduce visual clutter, giving a small entry a spacious, premium feel.
The Misconception That Thick Stone Thresholds Are Required for Water Defense
Another myth suggests that a home must have a tall stone threshold block at the front door to stop rain water leaks. While old-style builds relied on these step-up blocks, modern layouts use hidden drainage pans and recessed walk-off mats to trap water perfectly flush. This modern engineering eliminates dangerous tripping hazards while keeping interior living spaces dry and clean.
The Illusion That Waterproof Vinyl Click Planks Never Suffer From Water Damage
Many homeowners believe that purchasing flooring labeled “waterproof vinyl click planks” means the entry floor can handle large water puddles with zero risk. While the plastic planks cannot absorb water, liquid can seep down through the interlocking seams into the wood subfloor below. If water sits trapped beneath vinyl planks, it will rot the wood subfloor and trigger toxic mold growth, making proper under-tile waterproofing essential.
Material Origins, VOC Off-Gassing Ethics, and Structural Sustainability
Modern entryway floor planning requires careful material selection to protect indoor air quality and support sustainable manufacturing. When choosing manufactured composite tiles, epoxy resins, or floor sealers, builders should specify products that carry certified low-VOC labels. This practice stops harmful chemical vapors from concentrating inside small, enclosed entry areas, keeping indoor air safe and healthy for families.
Material sourcing should focus on durable, natural products that minimize environmental impacts over their lifetime. This includes specifying local stone slabs to reduce shipping emissions, choosing FSC-certified wood blocks, and using recycled glass terrazzo mixes. Selecting responsible local materials protects regional ecosystems and ensures home renovations support eco-friendly building practices.
Comprehensive Analytical Synthesis and Structural Fluidity
Configuring the best foyer floor layout for small spaces requires balancing durable material choices with precise subfloor engineering. The finished entry floor must operate effectively as both an attractive welcome mat and a heavy-duty physical barrier against outdoor mud and water. Homeowners must look past temporary design trends and focus on long-term structural needs: strengthening flexible floor joists, installing uncoupling mats, leaving expansion gaps, and choosing low-VOC materials. A well-engineered entry floor system lowers home maintenance costs, protects nearby wood floors, and preserves property values over time.
Modern home design demands flexible, high-performance spaces that can handle heavy daily use without requiring constant structural repairs. Foyer floor layouts should use durable, non-porous finishes paired with flush transition strips that allow easy access for future renovations. Focusing on substrate flatness, moisture protection, and solid structural backing ensures the floor installation remains a valuable asset. This disciplined engineering approach transforms a basic walkway into a high-performance entry threshold that serves the home efficiently for generations.
Further Reading & Sources
- This Old House — renovation cost guides and how-tos.
- National Association of Home Builders (NAHB) — construction standards and cost trends.
- U.S. Dept. of Energy — Energy Saver — insulation and efficiency guidance.