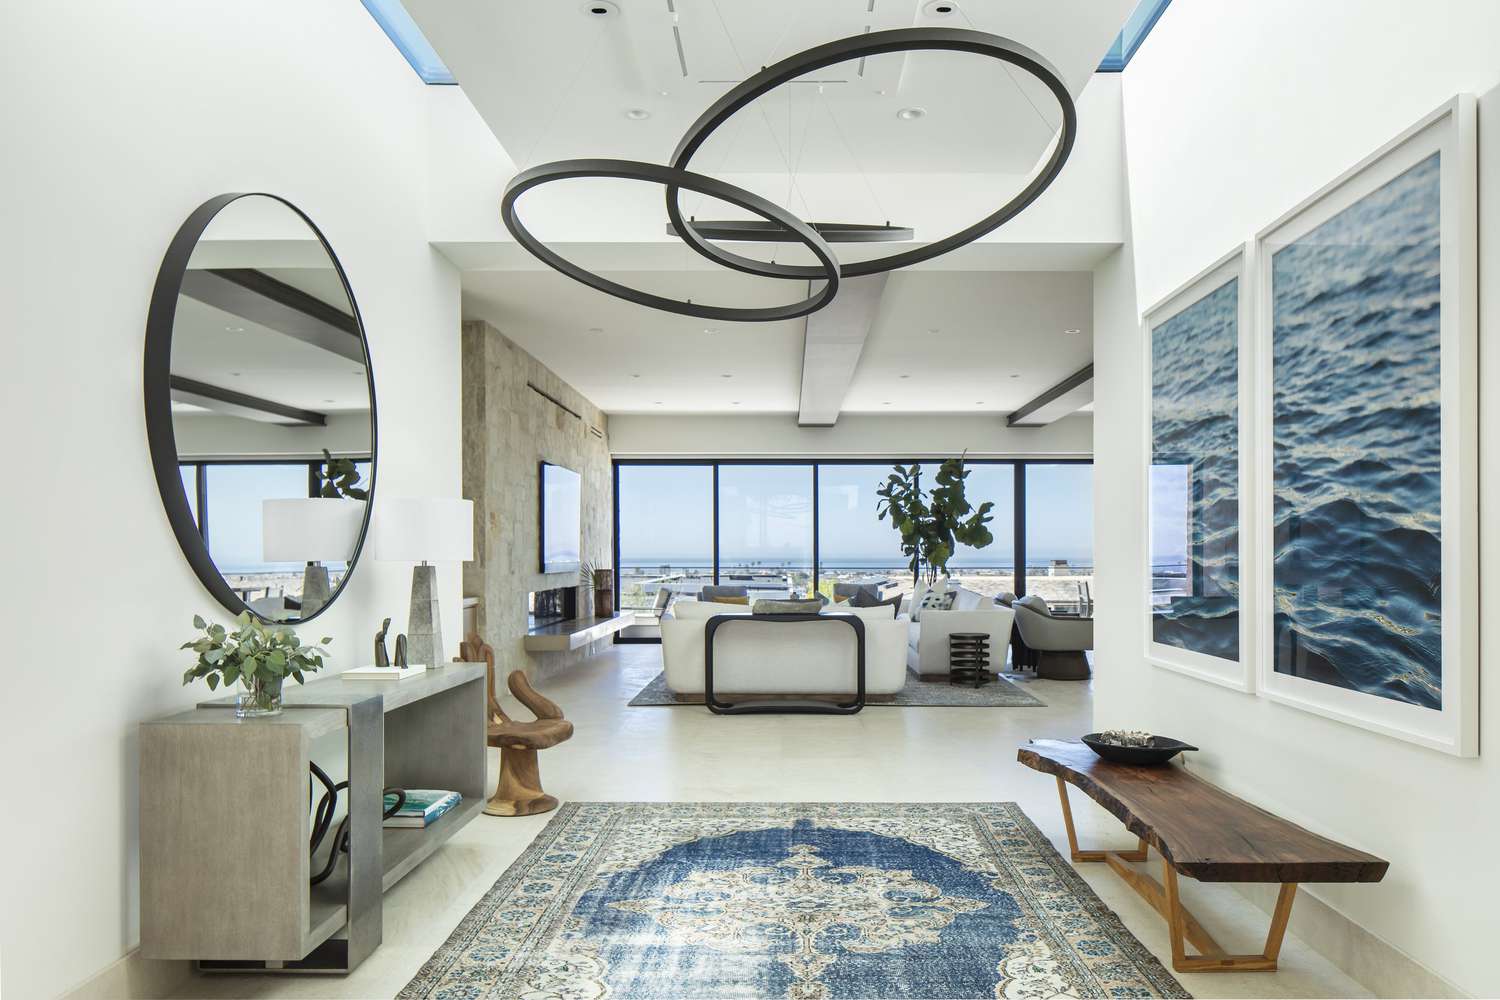
Best Foyer Ceiling Lighting Plans (2026 Guide)
The ceiling fixture is usually the visual anchor of a foyer. Getting its type, size, and placement right makes the entry feel intentional and well-lit; getting it wrong makes even a nice entry feel off. Here is how to plan foyer ceiling lighting for any ceiling height.
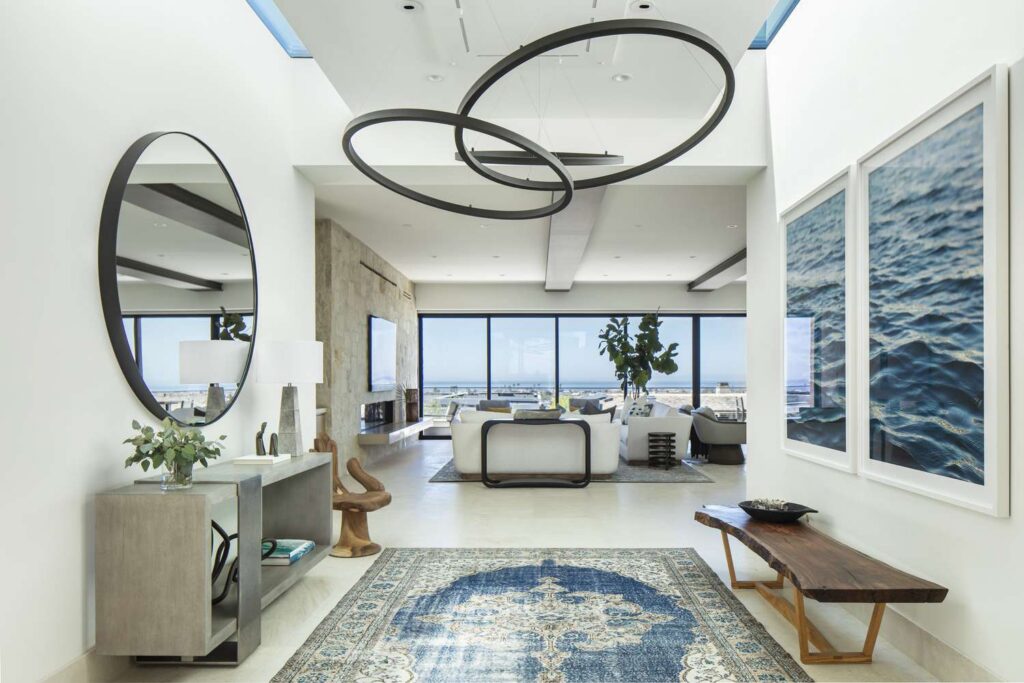
Match the fixture to the ceiling
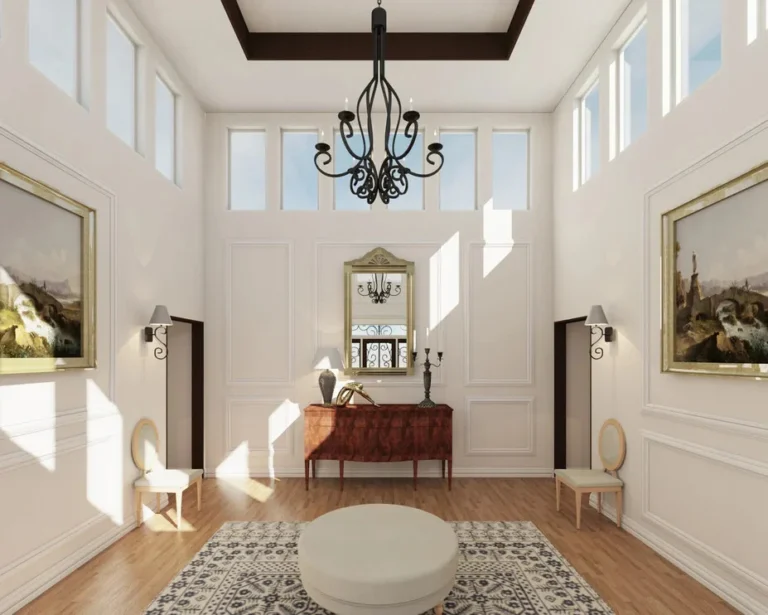
Ceiling height is the single most important factor. Low or standard ceilings call for flush or semi-flush mounts so nothing hangs into head space. Tall or two-story foyers can carry a hanging chandelier or a large pendant that fills the vertical volume. A fixture sized for the wrong ceiling is the most common entry-lighting mistake.
Ceiling lighting options
- Flush mount — best for ceilings under about 8 feet; clean and unobtrusive.
- Semi-flush mount — adds a little style for 8–10 foot ceilings.
- Pendant — a single statement light for medium ceilings.
- Chandelier — for tall or two-story entries; fills vertical space and makes a statement.
- Recessed lights — great as a layer alongside a main fixture, especially in larger entries.
Sizing and placement, step by step
- Measure ceiling height and room width.
- Size the fixture: a rough guide is to add the room’s length and width in feet and use that number in inches as the fixture diameter.
- Center the fixture on the entry or align it with the door and a console below.
- For two-story foyers, hang the bottom of the fixture roughly at the second-floor window line.
- Add recessed or wall lighting as a second layer if the space is large.
Common ceiling-lighting mistakes
- A fixture too small for the ceiling volume.
- Hanging a chandelier too low into head space.
- Relying on one source with no layering in a large entry.
- Cool-white bulbs that feel unwelcoming.
Cost reference
Fixture cost plus installation — with high ceilings adding labor for lifts — is shown in the ranges below.
Frequently asked questions
What lighting is best for a low foyer ceiling?
A flush or semi-flush mount keeps light even without hanging into head space.
How big should a foyer chandelier be?
Add the room’s length and width in feet; use that total in inches as a rough fixture diameter. Adjust for very tall ceilings.
How low should a two-story foyer fixture hang?
Generally so its bottom aligns near the second-floor window line, keeping ample clearance above the door.
Entryway Lighting & Chandelier Cost (2026)
Foyer lighting cost depends on fixture price plus installation — and high ceilings raise labor significantly because of scaffolding or lift requirements. Typical 2026 ranges in the U.S.:
| Scenario | Typical Cost |
|---|---|
| Standard chandelier install (8–10 ft ceiling) | $150 – $750 |
| Foyer install, high ceiling (13–19 ft) | $500 – $1,250 |
| Luxury / oversized fixture | $1,500 – $12,000+ |
Estimated ranges, 2026. High ceilings add labor for lifts/scaffolding. Sources: modern lighting installer guides, U.S. electrician averages.
The system uses a smart astronomical clock controller that reads local sunset times to adjust light output automatically. During bright afternoon hours, the system dials down power to save energy and reduce interior glass reflections. This clean setup matches the home’s modern look while protecting the internal electronics from moisture and shifting.
Historic Plaster Ceiling Conservation
A historic urban brick townhome features an entry hallway with ornate lath-and-plaster ceilings from the late nineteenth century. The homeowner wants to upgrade the old, dim light levels without drilling holes or cutting into the fragile historic plaster.
The preservation group develops an independent, perimeter-mounted lighting rail system that sits below the historic crown molding. Technicians mount slim metal tracks to the side walls, driving long screws into the hidden wall studs to avoid touching the ceiling plaster. They install tiny, high-output adjustable spotlights along these rails to throw light across the ceiling surface.
The new layout uses soft-matching warm bulbs that mimic historical gas lighting while providing plenty of clear light for safety. This independent setup supplies excellent brightness throughout the long hallway while keeping the historic ceiling untouched, satisfying local preservation rules.
A long, narrow entry hall inside a suburban home feels cramped, dark, and tight due to low ceilings and dark walls. The existing ceiling featured three standard flush-mount glass fixtures that created uneven pools of light and made the space feel shorter.
The architectural intervention focuses on expanding the look of the hallway using clever light placement. Carpenters drop the center ceiling panel slightly to create a hidden perimeter shelf along the side walls. They place high-density linear light strips inside this new pocket, aiming the light outward to wash the upper walls with brightness.
The indirect light bounces off the walls, making the narrow hallway look wider and creating a bright, welcoming feel. The old flush fixtures are replaced with tiny, deep-set downlights that blend out of sight when turned off. This smart combination opens up the tight hallway space without requiring structural wall demolition.
Capital Planning, Cost Dynamics, and Lifecycle Resource Allocation
Implementing premium entrance lighting requires a detailed understanding of project budgets, specialist labor costs, and long-term utility expenses. Projects fall into three distinct pricing tiers based on wiring complexity, fixture choices, and necessary structural changes.
A Tier 1 installation focuses on mounting standard flush fixtures or simple pendants over existing ceiling boxes. This entry setup uses factory-built fixtures, simple dimmers, and basic wiring layouts without modifying hidden framing systems or adding remote drivers. A Tier 2 project introduces advanced custom millwork, such as dropped ceiling coves, plaster-in rimless downlights, and dedicated multi-way lighting circuits. A Tier 3 project involves full architectural photometric integration. This top-tier work requires installing motorized fixture lifts, remote constant-current driver racks, custom smart home panels, and automated sensors. This complex work demands close coordination between lighting designers, certified electricians, and structural engineers.
Comprehensive Ceiling Infrastructure Cost Matrix
This matrix outlines projected cost ranges across key construction phases based on the selected utility tier and structural requirements.
| Cost Element Category | Tier 1 (Surface Mount) | Tier 2 (Plaster-In Spec) | Tier 3 (Remote Smart Spec) |
| Substrate Prep & Frame Support | $200 – $500 | $1,500 – $3,000 | $4,500 – $8,000+ |
| Conduit & Wiring Infrastructure | $300 – $700 | $2,000 – $4,500 | $6,000 – $12,000+ |
| Luminaire & Driver Procurement | $500 – $1,200 | $3,500 – $7,500 | $15,000 – $35,000+ |
| Control Panels & Smart Integration | $100 – $300 | $1,200 – $2,800 | $5,000 – $14,000+ |
| Specialist Labor & Tuning | $300 – $600 | $1,800 – $4,000 | $7,000 – $18,000+ |
| Total Project Cost Estimates | $1,400 – $3,300 | $10,000 – $21,800 | $37,500 – $87,000+ |
Tooling Specifications, Calibration Strategies, and Ceiling Support
Digital Photometric Light Meters
Balancing an entry’s light layers requires specialized light meters that measure brightness levels along floor surfaces in real time. Technicians use these handheld tools to check target foot-candle outputs and find uneven hot spots or dark zones. They record light levels across multiple floor points to ensure even illumination throughout the walking path. This testing process confirms the system meets safety rules while creating a smooth visual transition.
Laser Line Projectors and Hole Saws
Setting perfectly straight lines of rimless downlights requires precise layout tools. Installation crews use self-leveling green laser line projectors to map straight reference lines across high ceiling planes. They cut holes through plasterboard using adjustable tungsten-carbide hole saws hooked up to heavy-duty dust vacuums. This careful cutting ensures clean edges that allow plaster-in frames to fit tightly without cracking the surrounding drywall.
Heavy-Duty Threaded Steel Rods and Couplers
Standard drywall screws lack the structural strength to hold large chandeliers safely over long periods. Modern construction rules prevent failures by requiring heavy fixtures to be hung from threaded steel rods bolted directly to roof timbers. Installers lock these metal rods in place with double-locking nuts and thick washers to stop vibrations from loosening the connections. This strong support system prevents ceiling damage and keeps heavy fixtures securely anchored.
Oscilloscopes and Low-Voltage Dimming Testers
Debugging modern electronic dimming systems requires advanced circuit testing tools. Electricians use portable digital oscilloscopes to check electrical waves and stop light flickering caused by driver issues. They adjust dimming paths using specialized handheld programmers to ensure lights dim smoothly from full brightness down to low night settings. This precise tuning protects sensitive electronics and extends bulb life.
The Risk Landscape, Thermal Breakdown, and Compounding Risks
Excessive Driver Heat and Failure
Entryway lighting systems face intense operation demands because they run for long hours and sit inside tight ceiling cavities. A severe failure mode is electronic driver breakdown caused by trapped heat inside small junction boxes. If an installer packs power drivers tightly inside unvented ceiling spaces, the trapped heat will burn out circuits prematurely. Homeowners can prevent this by mounting drivers inside cool, vented equipment panels located in easy-to-reach utility rooms.
Roof Leaks and Fixture Water Damage
Another common risk involves water damage from hidden roof or pipe leaks above entry ceilings. If water seeps down into an unsealed light fixture, it can cause short circuits and ruin expensive solid-state light panels before becoming visible. Builders prevent this by using water-resistant fixtures on top floors and adding plastic shields over ceiling boxes to divert water safely away. Installing smart water sensors inside ceiling cavities provides early warning before leaks reach electrical lines.
Ceiling Frame Shifting and Plaster Cracks
Oversized entry areas with heavy front doors often experience strong wall vibrations from daily use. This continuous movement causes standard wood ceiling framing to shift and flex over time. If installers mount rigid plaster-in downlights without adding flexible mesh tape along the seams, this framing movement will crack ceiling joints. Using heavy-gauge steel studs and flexible fiberglass mesh prevents cracks, keeping ceiling surfaces smooth and flawless.
Maintenance Governance, Calibration Protocols, and Long-Term Adaptation
Preserving the functionality, safety, and appearance of custom entry lighting requires a structured, proactive maintenance plan. High fixtures and electronic dimmers need regular checkups. Homeowners should test emergency backup batteries and look over visible ceiling boxes every twelve months to catch worn wires or loose parts early. They should clean decorative glass pendants using distilled water and soft microfiber cloths, avoiding harsh chemical sprays that can strip protective metal finishes.
Smart dimming panels and motion sensors require periodic software updates to remain safe and reliable. Maintenance crews should test motion sensors every year to ensure lights turn on instantly when doors open. They should clear dust from automated sensor lenses using clean compressed air, preventing false triggers and keeping energy settings running efficiently.
The flexible rubber gaskets inside weather-rated outdoor entry fixtures require regular replacement to block moisture. These protective seals dry out and crack over time due to intense sun heat and freezing winter air. Homeowners should inspect exterior seals and replace worn gaskets every three to five years using basic hand tools. This routine service stops rain water from sneaking into electrical lines, preventing short circuits and protecting expensive entry systems.
Quality Assurance Documentation Framework
To maintain a complete history of project tracking and maintenance, three documentation examples are outlined below for home management logs:
-
Insulation Resistance Test Record: Documents the exact electrical resistance readings and inspector sign-offs completed before turning on new ceiling circuits.
-
Photometric Mapping Chart: A detailed diagram tracking exact foot-candle outputs and color temperature settings across all entry floor zones.
-
System Maintenance Diary: A seasonal history recording all fixture cleanings, driver replacements, and software updates completed over the lifetime of the installation.
Measurement, Performance Tracking, and Evaluation Metrics
Homeowners should monitor the efficiency of their entry lighting using clear, objective testing methods. Energy consumption can be checked by tracking daily electricity use through smart home power monitors. Reviewing these data logs helps confirm that automated night dimming paths are lowering power use effectively during late hours. A well-designed system should lower energy costs without sacrificing home security or walking path safety.
Visual comfort is evaluated by measuring glare levels along primary entry walking paths. Homeowners can use a digital glare meter to check light reflections bouncing off polished stone or glass floor tiles. A proper lighting plan should spread light evenly, eliminating blinding hotspots that could cause incoming guests to slip or trip.
Structural alignment is checked by monitoring the position of long pendant chains and recessed light rings over time. Homeowners should check these fixtures every spring and autumn using a precision level to see if heavy pendants are tilting or slipping. Catching minor frame movement early allows for quick structural fixes, keeping entry light systems safe and beautifully balanced for decades.
Deconstructing Systemic Hardware Misconceptions and Structural Myths
The Myth That More Ceiling Fixtures Always Deliver Better Visibility
A common misconception assumes that packing more light fixtures into an entry ceiling guarantees better visibility and a brighter space. In reality, adding too many unaligned downlights creates overlapping pools of bright glare that strain the eyes and wash out wall textures. Proper design focuses on balancing light layers and aiming beams strategically, supplying excellent visibility using fewer high-quality fixtures.
The Misconception That High-Output LEDs Last Forever Without Maintenance
Another myth suggests that solid-state light-emitting diode fixtures last forever and never require replacement or service. While LED bulbs outlast old incandescent bulbs, their internal electronic drivers remain highly sensitive to heat and power spikes. If an entry system suffers from poor ventilation or unstable power, the drivers will fail within a few years, making accessible power panels essential.
The Illusion That Large Chandeliers Provide Complete Entry Lighting
Many homeowners believe that hanging a massive, expensive chandelier provides all the light an entryway needs. While a large fixture makes a beautiful visual statement, it acts primarily as an ambient light source that cannot illuminate dark corners or accent artwork. A truly functional entry requires combining that central statement piece with hidden downlights and wall sconces to create a balanced, layered space.
Technological Integration Ethics, Security Vectors, and Material Origins
Modern automated entry lighting requires careful placement of motion sensors to protect household privacy. When installing smart cameras, presence detectors, or automated switches, builders must position sensors away from reading public sidewalks or neighboring yards. This smart layout stops sensors from tracking public movement or collecting outside data, protecting the home from digital privacy issues and security risks.
Material sourcing should focus on sustainable, non-toxic products that preserve indoor air quality and protect ecosystems. This includes choosing lead-free brass fixtures, specifying conflict-free minerals for internal circuit boards, and using recycled aluminum housings. Selecting responsible manufacturers protects assembly workers and ensures that home renovations support eco-friendly manufacturing practices around the world.
Conclusion
Creating an effective entry illumination system requires balancing beautiful design statements with reliable electrical execution. The selected ceiling fixtures must operate effectively as both welcoming visual assets and dependable safety shields. Homeowners must look past passing styling trends and focus on long-term infrastructure needs: reinforcing framing timbers, selecting remote driver systems, managing glare reflections, and protecting electronic circuits from heat buildup. A well-planned lighting system improves home security, lowers utility costs, and preserves property values over time.
Modern home design demands flexible, open spaces that can adjust to future technological changes without requiring major ceiling demolition work. Foyer lighting plans should include smart features like open access panels or oversized conduits that allow electricians to upgrade wires and dimmers easily. Focusing on material quality, structural stability, and clever layout design ensures the ceiling installation remains a durable asset. This disciplined approach transforms a basic hallway into a high-performance architectural entryway that serves the home efficiently for generations.
Further Reading & Sources
- This Old House — renovation cost guides and how-tos.
- National Association of Home Builders (NAHB) — construction standards and cost trends.
- U.S. Dept. of Energy — Energy Saver — insulation and efficiency guidance.